Monday, October 24, 2011

Modular Floral Globe Tutorial - Now in Zebra

I finally found a new material to re-do the orb fixture I had previously crafted using poster board. The other day I was looking at things in Walmart and spotted something interesting: sturdy plastic place mats that happened to be in a zebra pattern (I'm kind of partial to all things zebra at the moment).

And the price was right, only $2 a piece. So I brought one home, and proceeded to work on enlarging the original pattern, because I was hoping to make a larger version of my first orb. Well, I was able to cut out 6 larger "happy hot dog men" out of that placemat, which sent me back to Walmart for 9 additional placemats (60 hot dog men make up the orb!).


After a few days of hard labor, all that tracing and cutting, yesterday I was able to finally put the orb together, what do you think?
And here it is, in its intended location, with the light shining, making up the pretty pattern on the walls...

Saturday, June 25, 2011

Modular Floral Globe Tutorial

Once again, inspired by the awesomeness that is Pinterest, I got crafty and decided to tackle this intricate light fixture that I've seen time and time again on the site. The reason why I thought I could possibly accomplish the task is that I have rekindled my passion for origami in the last year, particularly, I have fallen in love with modular origami, which is easier than it looks. Here are some of my creations:


But I digress... Anyways, my first thought was to use the pieces that make up the globe out of plastic, and immediately I thought of milk gallons, since my family goes through one a day. I figured out the pattern, and was able to cut out one piece out of a milk gallon jug, but that's when I abandoned the idea of making this thing out of the milk jugs, because the milk jugs around here only have one flat side suitable for cutting the pattern out, and that would mean sixty jugs, I would probably get discouraged and not finish the project by then. But that first piece I cut out from the milk jug came in handy as a sturdy template for later on. Here is a picture of the template (my son Grant nickamed it "happy hot dog man", after something silly he saw on tv):

The actual hot dog guy is just short of 6" tall, and the finished globe is about 16" round.


I decided to make the globe out of paper, I bought 3 sheets of poster board, I wish I could come up with a better material, and if anyone out there has suggestions, I'd love to hear it. I thought of sheets of cork, as the local dollar store had 2 sheets (about 12 inches square) for $ 2, but I found they were too thick, and hard to cut, because the edges crumble.
Well, it turns out I neeeded 60 happy hot dog men. Which meant a lot of tracing, and cutting. I would get tired of just tracing or just cutting, so I did a bit of both and some assembly in between.

The next step was to get some fasteners (I got mine at Staples, 1" brass, the kind that has two little legs that spread apart). Like so:

I had a box kicking around that was almost full, I don't know how many, but there were a lot of them. I had to run out and get a second box, so do yourself a favor and get lots of these. No, I'm not about to count how many. Sorry!

Anyways, next, I joined five hot dog men together through the center with one of the fasteners, and again, at all the sides, to form a snow-flake type of thingie (12 snowflakes are needed for the globe):


I realize now that I did not join the sides with the fasteners when the picture was taken, so the best way to explain it is that you join all the little heads together (as the picture demonstrates), next you attach their little hands with fasteners (5 more fasteners needed), and leave their little legs dangling for the next step. I also forgot to mention that you should puncture the places where the fasteners will go (that is, all the "heads", "hands" and "feet") ahead of time, I used a metal skewer.

I wish I could explain in detail how the globe goes together,but this is one of those things that go together quite organically, and the explanation would be more complicated than the actual process.  Once you have the snowflake pieces ready and start assembly, the only thing to remember is that aside from the center of each snowflake, all the other joints will be made out of 3 limbs, so you will always be joining either a foot or a hand to another one, and the whole thing starts forming a round shape naturally:


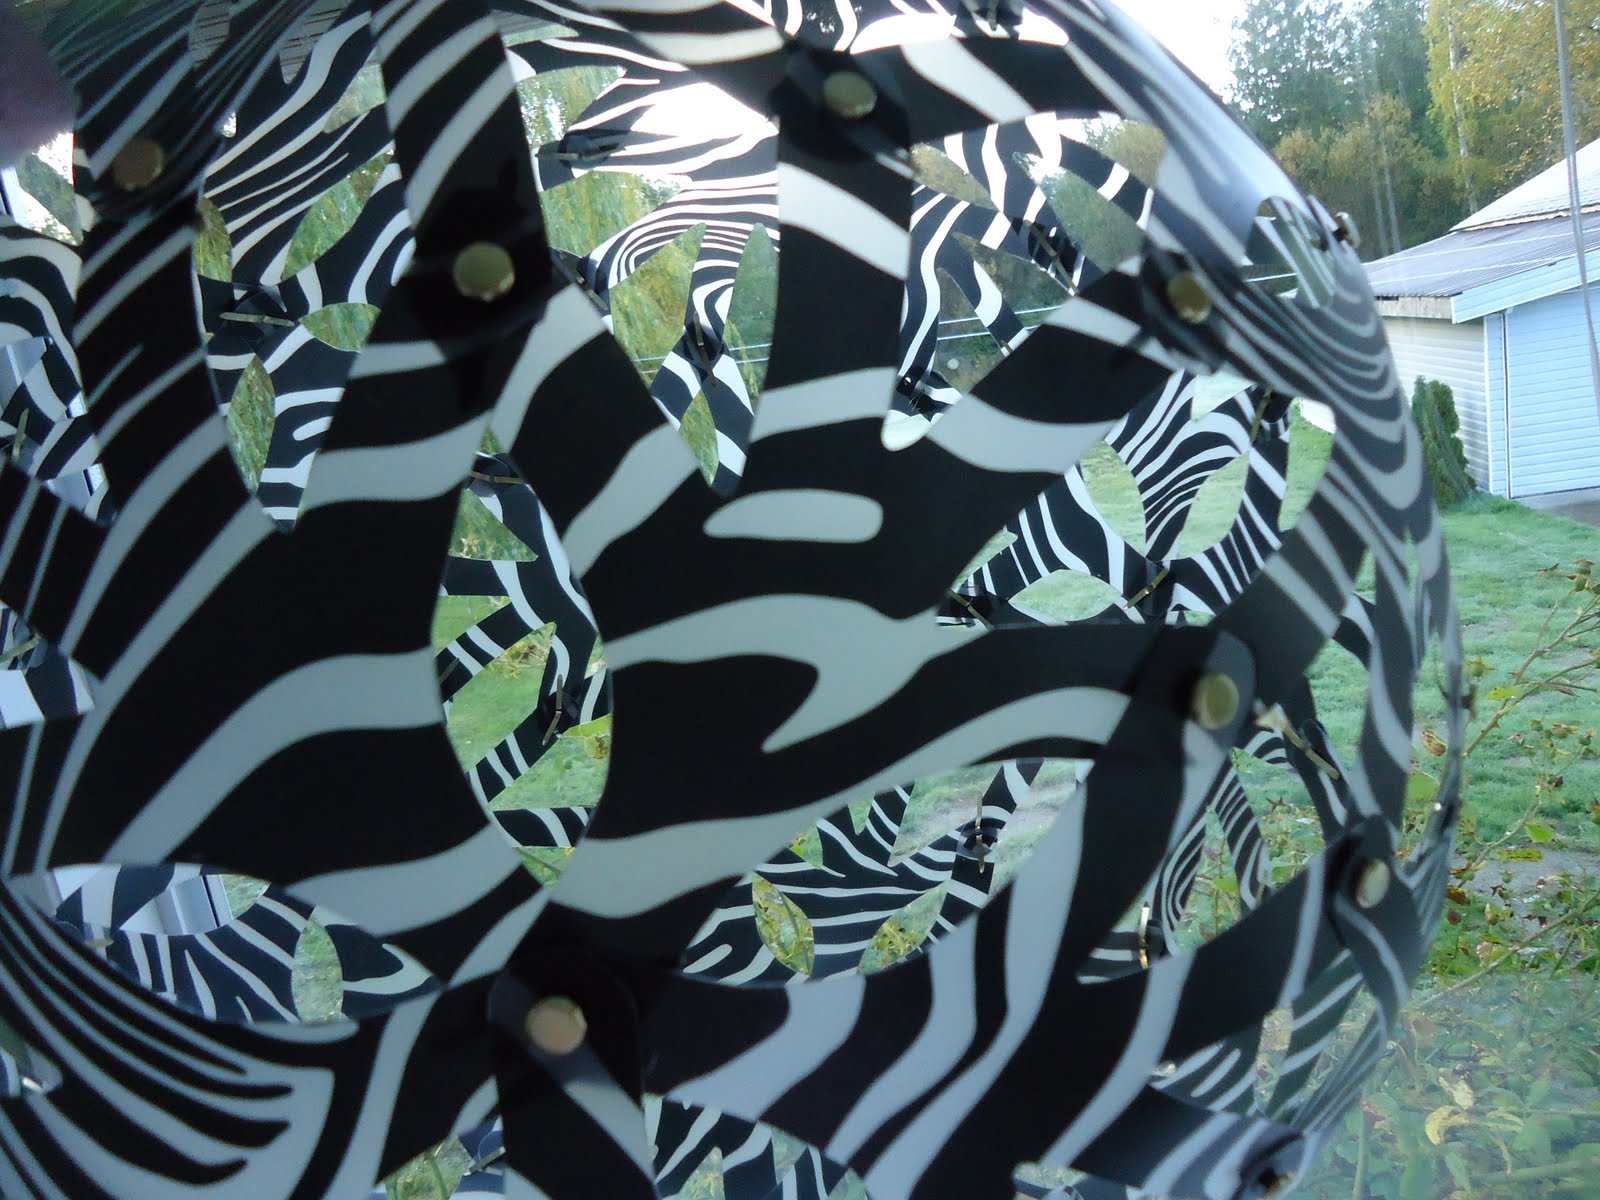
Don't be intimidated by the assembly, like modular origami, it only looks hard. Here is the finished globe:


I welcome suggestions for construction materials, I will post more pictures once my husband finds the time to actually make this into a light fixture.


UPDATE: My awesome husband was kind enough to take the old fixture down and hang the globe for me. I think I will make a bigger globe for this space, once I have found a more suitable material (ideas, please!).


Wednesday, June 22, 2011

A Sunburst Mirror

The finished project


So, I've been spending a lot of time on Pinterest, and it's true that people post a lot of pictures of lovely rooms and I noticed that a great number of those have a "sunburst" mirror featured somewhere. I have been a fan of sunburst mirrors for a while now, and as a matter of fact, I layered two bought ones and hang them above my bed:


One of the side effects of "Pinteresting" is that you get the urge to get crafty, and this afternoon, I decided I needed another sunburst mirror. Had to have it.
So I gathered things I had around the house. Really, I did not spend a dime. 
Here's my supply list:


. Remnants of a bamboo roller shade that I had to shorten (I knew those long bamboo sticks would come in handy one day). Here's the exact blind I'm talking about, also in my bedroom:


. A round mirror, about 8" in diameter, it originally cost $ 3 at the dollar store, I think this type of mirror is intended for a table centerpiece, for candles, for example.
. Small round mirror circles, also from the dollar store. I just had a bunch of these leftover from another project.
. Hot glue gun, of course.
. Silver spray paint, from hubby's garage.


. Ok so first I cut the bamboo pieces to size. I used some 13" pieces (those were the flat bamboo pieces), 11" and 9". 


I was thinking about the easiest way to arrange the pieces, and how I would be able to space the different pieces at about the same distance from one another, and what I came up with was to draw a circle about 1" smaller than the mirror and cut it out. So from there, I folded the circle in half, in half again, and continued to fold until I had as many folds on the paper as I thought would make up the starburst pattern:


This made it easy for me to lay out the longest pieces (I centered the paper on the mirror, and attached it with a piece of tape so it wouldn't budge while I worked):


From there, I finished hot-glueing the first layer, and moved on the the shorter pieces, I used two 11" and one 9" in between the longer pieces, but of course you could arrange the pieces however you liked, there are no real rules.


After a lot of gluing and a few scorched fingers, it was time to decide if it should be left au naturel (the blinds were a kind of white wash, but the sunburst mirror didn't seem finished as it was somehow) or if I had to call on my husband's excellent skills with a can of spray paint.  In the end, the silver paint won, and I actually liked how shiny and finished it looked (notice that the mirror part was still covered with the template, so as not to get the mirror all painted - but you knew that).


I think this mirror would would have been just as successful and maybe even a little slicker if the bamboo sticks had been glued to the underside of the mirror. Oh well, next time. But to finish this  project off, I added a layer of small round mirrors all around the raw edges, where all the glue was unsightly:

Lastly, I used a trick I learned on Pinterest to attach a hanging hook to the back of the mirror: a pop tab, from a pop can, hot glued (here is hoping that it holds! Maybe I should have used Gorilla Glue!):


Tah Dah! I thought I would put it above the couch in the living room, but I didn't think it belonged there after all. So I had this very empty wall on the hallway by the kitchen, I think it looks fab. 


Wednesday, June 8, 2011

Messy Miscellaneous Cables No More

I saw this done somewhere on the web a while ago, and driven by the frustration of never finding the right cord/ cable I need for any of my many devices, I finally got around to save a few empty toilet paper rolls and voila! One very organized cable collection!
What I like about this one is that if you are careful to wind the cord up so both ends are showing through the top of the rolls, you can find what is needed without having to mess up your whole drawer. Genius!