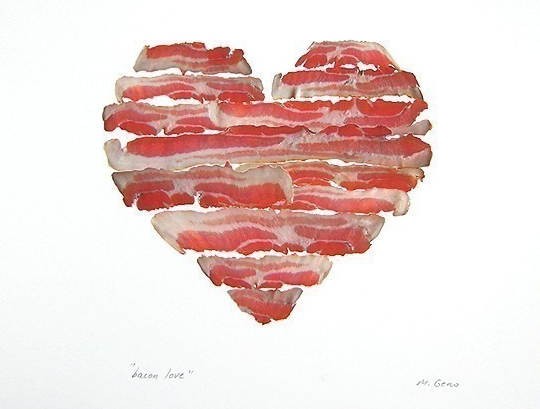
Here's a quick tip that I came up with out of frustration with having to deal with frozen blocks of sliced bacon... We love the occasional "breakfast for dinner", but I go easy on the bacon and usually only cook half the package, and the other half doesn't get used for at least a couple of weeks, which means storing it in the freezer. Here's my solution:
A few things that caught my eye...
Monday, April 29, 2013
Thursday, March 14, 2013
My sock drawer was a disaster. I had more socks without mates than not, and other miscellaneous "stuff" found their way in there too.
The before shot. Sad, right? |
First you're going to have to get some sturdy material to construct the dividers, I used a couple of plastic signs that I had put aside (used ones, so bonus recycling!) and also Contact paper to pretty things up.
I measured the drawer for inside length/ width and height, and decided how many cells I could get for the size of my drawer which measured 15" x 13" x 3", so I figured 5 cells going across and 5 down would be perfect.
So next, I set to work on the plastic board, I cut 4 strips for both sizes (15"x 3" and 13" x 3"), 8 strips in total.
And then I measured the half horizontal point on each board, and marked that in ink. I then marked my 4 points for the cells (15/3= every 3 inches, 13/5 = every 2.16 inches).
The next step was to cut the notches where I had marked for the cells, make sure you cut generous notches so the finished pieces fit together easily, like so:
Because I had some Contact paper leftover from another project I was able to cover the strips, and I found that the best way was to wrap the Contact paper completely around the piece, so both edges (upper and lower) would look finished; the ends of the strips did not matter so much because the would be tight against the inside of the drawer, so they are not visible. I felt with my fingers for the pre-cut notches and cut through the Contact paper.
Almost done, now to fit the strips together, I just lined up the notches and everything came together very quickly:
And here is the finished product! No more searching for socks, I know what I have at a glance and I will not collect any more socks than I have room for in the drawer. I think this is going to work well, so much so that I plan to do the same thing for my underwear drawer. Enjoy!
Thursday, May 3, 2012
It must be spring time!
So even though the air is still a bit chilly here in British Columbia, I try to spend any semi-sunny afternoons outside weeding and sprucing things up around the house. And today, after a very vigorous weeding session, I decided to venture out in the very back of our property, which is not so much like a yard, as much as it is a swamp. I retreated back for my gumboots, which had been sitting forgotten on a corner of our back porch since the fall. My first thought was.... spiders! I just read about a case of a brown recluse spider hiding inside a person's shoe and said person ended up with a gangrened foot. I put on gardening gloves and hoped for the best as I felt for any arachnids that may have taken up residence inside my boots, but, luckily found none.
That's when I had an idea for a very easy solution for this problem: pantyhose! I've used pantyhose before for a different project (seriously, who wears pantyhose these days? I'm embarrassed to say I had a pair left from the 1990's - in ivory!), so you could say I am a fan!
Here's what you do: to prevent spiders, or any other bugs from invading your gumboots, slip on a piece of pantyhose, tying up at the top if necessary (I only had one piece of pantyhose leg left, but it worked just fine):
The pantyhose fits very snugly around the opening, and it allows the boots to breathe.
On a side note - last summer I noticed my cat hanging around the porch and looking intently into my gumboots, I had the shock of my life when I saw the reason for his odd behaviour - my guess is that he caught a mud weasel and carried the poor thing back to present us with it; the creature somehow either got away from him and hid inside my boot or got put in there by the cat, I'll never know. Either way, it had expired by the time I found it :(
Friday, April 13, 2012
Capacitive Stylus DIY
I have to confess to playing "Draw Something" on my Ipod Touch a lot lately. I know, I know, another time-waster, but what can I say, I like showing off my mad drawing skills.
So, out of necessity came this very simple DIY project... I noticed how hard it was to draw with my finger, more often than not, my drawing did not resemble anything like what I was supposed to draw. I looked on Ebay for a "capacitive stylus" (the kind works on touch screens such as Iphones and tablets), and even though they are dirt cheap (some for less than 1 dollar!), I know that for the most part it would take about 3 weeks to a month for delivery (shipped from China). And I did not want to wait, I wanted something to make my drawings better right away. My next thought was to look on Youtube, and I got some ideas, but most of them were complicated (one person said you needed an umbrella, for the metal tubing part, I thought that was a bit wasteful). I went rooting through my junk drawers, and finally ended up finding something interesting in my son's desk drawer - an empty bullet casing (I have no idea where he got it - but thank goodness for teenage boys!).
The next step is to cut a small chunk of sponge and trim the rougher side off, you will need the softer side, it has a strange texture, cellulose maybe? I'm not sure.
Next, you tuck the piece of sponge into the bullet casing, exposing a bit of the sponge (make it a bit rounded and adjust to make it a more precise point).
So, out of necessity came this very simple DIY project... I noticed how hard it was to draw with my finger, more often than not, my drawing did not resemble anything like what I was supposed to draw. I looked on Ebay for a "capacitive stylus" (the kind works on touch screens such as Iphones and tablets), and even though they are dirt cheap (some for less than 1 dollar!), I know that for the most part it would take about 3 weeks to a month for delivery (shipped from China). And I did not want to wait, I wanted something to make my drawings better right away. My next thought was to look on Youtube, and I got some ideas, but most of them were complicated (one person said you needed an umbrella, for the metal tubing part, I thought that was a bit wasteful). I went rooting through my junk drawers, and finally ended up finding something interesting in my son's desk drawer - an empty bullet casing (I have no idea where he got it - but thank goodness for teenage boys!).
308 bullet casing |
Finding the bullet casing was the hardest thing about this project, as the next item was something I keep handy in the kitchen - a regular kitchen sponge (a brand new one of course).
Walmart Great Value All Surface Sponge |
Next, you tuck the piece of sponge into the bullet casing, exposing a bit of the sponge (make it a bit rounded and adjust to make it a more precise point).
That is all! It works like a charm, way better for drawing than my finger! I think I will end up buying a prettier stylus, but until then, this works just fine.
Monday, October 24, 2011
Modular Floral Globe Tutorial - Now in Zebra
I finally found a new material to re-do the orb fixture I had previously crafted using poster board. The other day I was looking at things in Walmart and spotted something interesting: sturdy plastic place mats that happened to be in a zebra pattern (I'm kind of partial to all things zebra at the moment).
And the price was right, only $2 a piece. So I brought one home, and proceeded to work on enlarging the original pattern, because I was hoping to make a larger version of my first orb. Well, I was able to cut out 6 larger "happy hot dog men" out of that placemat, which sent me back to Walmart for 9 additional placemats (60 hot dog men make up the orb!).
After a few days of hard labor, all that tracing and cutting, yesterday I was able to finally put the orb together, what do you think?
And here it is, in its intended location, with the light shining, making up the pretty pattern on the walls...
Saturday, June 25, 2011
Modular Floral Globe Tutorial
Once again, inspired by the awesomeness that is Pinterest, I got crafty and decided to tackle this intricate light fixture that I've seen time and time again on the site. The reason why I thought I could possibly accomplish the task is that I have rekindled my passion for origami in the last year, particularly, I have fallen in love with modular origami, which is easier than it looks. Here are some of my creations:
But I digress... Anyways, my first thought was to use the pieces that make up the globe out of plastic, and immediately I thought of milk gallons, since my family goes through one a day. I figured out the pattern, and was able to cut out one piece out of a milk gallon jug, but that's when I abandoned the idea of making this thing out of the milk jugs, because the milk jugs around here only have one flat side suitable for cutting the pattern out, and that would mean sixty jugs, I would probably get discouraged and not finish the project by then. But that first piece I cut out from the milk jug came in handy as a sturdy template for later on. Here is a picture of the template (my son Grant nickamed it "happy hot dog man", after something silly he saw on tv):
I decided to make the globe out of paper, I bought 3 sheets of poster board, I wish I could come up with a better material, and if anyone out there has suggestions, I'd love to hear it. I thought of sheets of cork, as the local dollar store had 2 sheets (about 12 inches square) for $ 2, but I found they were too thick, and hard to cut, because the edges crumble.
Well, it turns out I neeeded 60 happy hot dog men. Which meant a lot of tracing, and cutting. I would get tired of just tracing or just cutting, so I did a bit of both and some assembly in between.
The next step was to get some fasteners (I got mine at Staples, 1" brass, the kind that has two little legs that spread apart). Like so:
I had a box kicking around that was almost full, I don't know how many, but there were a lot of them. I had to run out and get a second box, so do yourself a favor and get lots of these. No, I'm not about to count how many. Sorry!
Anyways, next, I joined five hot dog men together through the center with one of the fasteners, and again, at all the sides, to form a snow-flake type of thingie (12 snowflakes are needed for the globe):
I realize now that I did not join the sides with the fasteners when the picture was taken, so the best way to explain it is that you join all the little heads together (as the picture demonstrates), next you attach their little hands with fasteners (5 more fasteners needed), and leave their little legs dangling for the next step. I also forgot to mention that you should puncture the places where the fasteners will go (that is, all the "heads", "hands" and "feet") ahead of time, I used a metal skewer.
I wish I could explain in detail how the globe goes together,but this is one of those things that go together quite organically, and the explanation would be more complicated than the actual process. Once you have the snowflake pieces ready and start assembly, the only thing to remember is that aside from the center of each snowflake, all the other joints will be made out of 3 limbs, so you will always be joining either a foot or a hand to another one, and the whole thing starts forming a round shape naturally:
Don't be intimidated by the assembly, like modular origami, it only looks hard. Here is the finished globe:
I welcome suggestions for construction materials, I will post more pictures once my husband finds the time to actually make this into a light fixture.
UPDATE: My awesome husband was kind enough to take the old fixture down and hang the globe for me. I think I will make a bigger globe for this space, once I have found a more suitable material (ideas, please!).
But I digress... Anyways, my first thought was to use the pieces that make up the globe out of plastic, and immediately I thought of milk gallons, since my family goes through one a day. I figured out the pattern, and was able to cut out one piece out of a milk gallon jug, but that's when I abandoned the idea of making this thing out of the milk jugs, because the milk jugs around here only have one flat side suitable for cutting the pattern out, and that would mean sixty jugs, I would probably get discouraged and not finish the project by then. But that first piece I cut out from the milk jug came in handy as a sturdy template for later on. Here is a picture of the template (my son Grant nickamed it "happy hot dog man", after something silly he saw on tv):
The actual hot dog guy is just short of 6" tall, and the finished globe is about 16" round.
I decided to make the globe out of paper, I bought 3 sheets of poster board, I wish I could come up with a better material, and if anyone out there has suggestions, I'd love to hear it. I thought of sheets of cork, as the local dollar store had 2 sheets (about 12 inches square) for $ 2, but I found they were too thick, and hard to cut, because the edges crumble.
Well, it turns out I neeeded 60 happy hot dog men. Which meant a lot of tracing, and cutting. I would get tired of just tracing or just cutting, so I did a bit of both and some assembly in between.
The next step was to get some fasteners (I got mine at Staples, 1" brass, the kind that has two little legs that spread apart). Like so:
I had a box kicking around that was almost full, I don't know how many, but there were a lot of them. I had to run out and get a second box, so do yourself a favor and get lots of these. No, I'm not about to count how many. Sorry!
Anyways, next, I joined five hot dog men together through the center with one of the fasteners, and again, at all the sides, to form a snow-flake type of thingie (12 snowflakes are needed for the globe):
I realize now that I did not join the sides with the fasteners when the picture was taken, so the best way to explain it is that you join all the little heads together (as the picture demonstrates), next you attach their little hands with fasteners (5 more fasteners needed), and leave their little legs dangling for the next step. I also forgot to mention that you should puncture the places where the fasteners will go (that is, all the "heads", "hands" and "feet") ahead of time, I used a metal skewer.
I wish I could explain in detail how the globe goes together,but this is one of those things that go together quite organically, and the explanation would be more complicated than the actual process. Once you have the snowflake pieces ready and start assembly, the only thing to remember is that aside from the center of each snowflake, all the other joints will be made out of 3 limbs, so you will always be joining either a foot or a hand to another one, and the whole thing starts forming a round shape naturally:
Don't be intimidated by the assembly, like modular origami, it only looks hard. Here is the finished globe:
I welcome suggestions for construction materials, I will post more pictures once my husband finds the time to actually make this into a light fixture.
UPDATE: My awesome husband was kind enough to take the old fixture down and hang the globe for me. I think I will make a bigger globe for this space, once I have found a more suitable material (ideas, please!).
Wednesday, June 22, 2011
A Sunburst Mirror
The finished project |
So, I've been spending a lot of time on Pinterest, and it's true that people post a lot of pictures of lovely rooms and I noticed that a great number of those have a "sunburst" mirror featured somewhere. I have been a fan of sunburst mirrors for a while now, and as a matter of fact, I layered two bought ones and hang them above my bed:
One of the side effects of "Pinteresting" is that you get the urge to get crafty, and this afternoon, I decided I needed another sunburst mirror. Had to have it.
So I gathered things I had around the house. Really, I did not spend a dime.
Here's my supply list:
. Remnants of a bamboo roller shade that I had to shorten (I knew those long bamboo sticks would come in handy one day). Here's the exact blind I'm talking about, also in my bedroom:
. A round mirror, about 8" in diameter, it originally cost $ 3 at the dollar store, I think this type of mirror is intended for a table centerpiece, for candles, for example.
. Small round mirror circles, also from the dollar store. I just had a bunch of these leftover from another project.
. Hot glue gun, of course.
. Silver spray paint, from hubby's garage.
. Ok so first I cut the bamboo pieces to size. I used some 13" pieces (those were the flat bamboo pieces), 11" and 9".
I was thinking about the easiest way to arrange the pieces, and how I would be able to space the different pieces at about the same distance from one another, and what I came up with was to draw a circle about 1" smaller than the mirror and cut it out. So from there, I folded the circle in half, in half again, and continued to fold until I had as many folds on the paper as I thought would make up the starburst pattern:
This made it easy for me to lay out the longest pieces (I centered the paper on the mirror, and attached it with a piece of tape so it wouldn't budge while I worked):
From there, I finished hot-glueing the first layer, and moved on the the shorter pieces, I used two 11" and one 9" in between the longer pieces, but of course you could arrange the pieces however you liked, there are no real rules.
After a lot of gluing and a few scorched fingers, it was time to decide if it should be left au naturel (the blinds were a kind of white wash, but the sunburst mirror didn't seem finished as it was somehow) or if I had to call on my husband's excellent skills with a can of spray paint. In the end, the silver paint won, and I actually liked how shiny and finished it looked (notice that the mirror part was still covered with the template, so as not to get the mirror all painted - but you knew that).
I think this mirror would would have been just as successful and maybe even a little slicker if the bamboo sticks had been glued to the underside of the mirror. Oh well, next time. But to finish this project off, I added a layer of small round mirrors all around the raw edges, where all the glue was unsightly:
Lastly, I used a trick I learned on Pinterest to attach a hanging hook to the back of the mirror: a pop tab, from a pop can, hot glued (here is hoping that it holds! Maybe I should have used Gorilla Glue!):
Tah Dah! I thought I would put it above the couch in the living room, but I didn't think it belonged there after all. So I had this very empty wall on the hallway by the kitchen, I think it looks fab.
Subscribe to:
Posts (Atom)